Installing your new Kunkle valve is a straightforward process, and it’s important to install it correctly per ASME Boiler and Pressure Vessel Code requirements to ensure proper operation. In this quick guide, we’ve outlined the basic steps for valve installation, plus a couple of tips for success. If you have any questions about installing your valve, give us a call at (314) 665-1741.
Step 1: Don appropriate personal protective equipment (PPE)
Always wear safety glasses and ear protection when you’re working on your facility’s equipment.
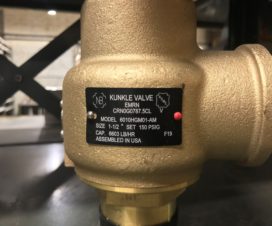
Step 2: Verify the model number
Before installing your Kunkle valve, double-check that the model number matches your order and that the valve’s set pressure, service media, and temperature limits are correct for your application. And remember to handle your new valve with care — some parts are fragile.
Step 3: Mount the valve
Mount the valve in a vertical position. This will help to ensure that:
- The valve body is self-draining.
- The valve is installed to code.
- The correct seat tightness and set pressure will be achieved.
A few tips about this process:
- If you have a drain port, make sure that it is open when required by the ASME code.
- Determine if the bonnet vent opening should be plugged or not. If a valve is supplied with any bonnet vents open, they should never be plugged.
- Try to use the shortest inlet piping possible with no elbows and a diameter equal to or greater than the valve inlet connection. Doing so will help make sure that the inlet pressure drop is < 3% when the valve relieves pressure.
- Prevent damage to your valve when putting it into position by making sure your lifting straps don’t accidentally wrap around or otherwise interfere with the lift lever.
Step 4. Connect the discharge piping (when applicable)
If you connect the discharge piping to the valve, do not connect your valve to any discharge pipe that:
- Contains pressure before the valve opens.
- Has pressure build-up > 10% of the set pressure when the valve is open and relieving.
After you’ve identified your discharge piping, here are a few specifics to remember based on your configuration.
- If you’re not using a body port drain, make sure the discharge pipe is self-draining.
- If you have a steam service, use a drip pan elbow or flexible connection between the valve and pipe. This helps to minimize stress from thermal expansion on the valve body.
- If you have any discharge piping other than a short tailpipe, it must be supported.
Step 5: Attach the valve to the connecting pipe
Threaded valves
Apply a sealing compound to the outside threads, taking care to avoid applying it to the first thread. Never apply sealing compound to internal threads. Otherwise, you risk damaging the inside of your valve and causing seat leakage. Then, tighten the valve to the connecting pipe enough to create a pressure-tight seal. Use only a wrench flat — do not apply pressure to the bonnet or valve body during tightening, and be careful not to over-tighten the valve.
Flanged valves
Attach the valve to the connecting pipe using new gaskets — using new gaskets is always recommended for the best results. Tighten the mounting studs in an even fashion, using a star pattern, just like you would when installing the wheels on a car.
Step 6: Remove the gag screw
Remember to remove the valve’s gag screw (if equipped) before starting up your system.
For more details, refer to this document: Manual: Pressure Relief Valves, Kunkle Valve